Saturday, July 30, 2011

Tearing out more of the bathroom

This is how the bathroom looked when I last worked on it.  I have not had time to do any work on the bus during this past week, other than throwing all the demolition debris out the rear window and into the bed of LaRon's pickup.  I secured his help in taking a load to the dump Tuesday.  I then was able to sweep up the bedroom and move some things around this afternoon so I could do more demolition.  I managed to get the rest of the shower stall removed.  All that remains is the shower pan which isn't even attached to anything.


I had hoped to have been further along by the end of today, but removing anything seems to be such a struggle.  Everything is glued, screwed, and in some places riveted.  The P/O certainly had no plans for any of this to come out.  So, the way things ended today, I have one wall remaining on the curb side to remove and two walls along with the kitchen cabinets and counter on the street side.  I suspect removing the kitchen will be the most difficult yet.


This shows what needs to be removed from the kitchen area.  I hate having to tear out the kitchen as it looks really nice.  However,  the cook top is only 1-1/2" from the wall.  Too close as far as I am concerned for a gas burner.  I need to remove the window from the kitchen area and I would like to install a smaller RV slider window over the sink.  The range hood will need to be moved also to match the placement of the cook top.  Then there is the issue of insulating the ceiling and walls of that area along with the rest of the bus.  So, as you can see, pretty or not, it all needs to go.  BTW, not a fan of the blue counter top either.

Sunday, July 24, 2011

Begin bathroom tear out

Today I finished removing the street side wall separating the bedroom and bath.
You can see here that the wall next to the sink is missing and the sink is still attached.  Removing the sink from the wall was on of the easiest tasks in this tear out so far.  Only two screws remained after the wall was out, I went below and disconnected the hot and cold water supply lines, then came back up top and cut the waste line with the saw-zall in a convenient spot.


Here you see the sink before it was removed as well as the placement of the existing toilet and wall.  These pictures will be reference points for me when I begin the rebuild.  I suspect that the sink, toilet, and shower will all go back in the original places.


In this picture you can see the curb side dividing wall is gone and how the shower stall was framed on the one side.  Once the sink was out, I began to dismantle the shower stall door.  I think I worked well over an hour just trying to get all the screws out and beginning to cut through all of the caulk and sealant. I managed to remove the door, the top and right side railing but could not get the left rail out because the blade broke in the cutter I was using to cut through the caulk.  Tomorrow I'll make a trip to Home Depot and buy some more blades and work on the shower door some more.  The door looked very nice, but I'm not sure I will go back with it.  It will take only a few minutes to remove a shower curtain as opposed to the hours of labor to remove the door and all the trim pieces.  We'll see when the time comes to put it back.  I was getting tired and figured this would be a good stopping point for the day.

Saturday, July 23, 2011

Finish bedroom tear out

Barry and I finished tearing out the build in the bedroom and started removing the walls separating that and the bath.  The curb side wall is all out and also that side wall covering.  I started removing the street side wall, but only got half way done with that before the heat just became too much.

I turned on the front roof air this morning and it was ok for a while, but after the afternoon sun rolls around the bus begins to bake.   With the bus not very well insulated, which is one of the reasons for the tear out, the a/c cannot keep up.  By the time I quit it was 89 inside and I had done enough for one afternoon.

Thursday, July 21, 2011

Starting the tear out

With the fuel prime issue resolved and the engine once again running smoothly I'm on to new tasks.  I have decided to completely strip the inside of the bus down to the metal framwork in the walls and ceiling.  I want to see what rust lurks behind the walls and fix it in preparation for spray insulating, removing windows, and reskinning.

Today Barry (sometimes we call him Patch) and I started stripping out the bedroom.  Barry has been a God send and is always there to help me with the bus.  We compliment each other well and between the two of us, and the internet "bus boards" as I call them, there is not much we can't figure out.  The previous owner did a good job of building parts of the inside carpenter wise, just not that I wanted in some areas and also I did not agree with some of his wiring methods.  So for several reasons I've decided the inside must go and be redone.  What is making the tear out so difficult is that the P/O glued and screwed every piece of wood installed.  He surely had no intention of ever tearing any of this out.  So it is all a struggle.  I'm trying to save any good wood that I can, especially the oak pieces, but some just can't help but be ruined.  If only he had not glued everything.

We are in a heat wave, as are lots of parts of the midwest, this year.  The high today was 96 with indexes in the 108 range.  After 4 hours this afternoon in the bus (even with one a/c running) we were both exhausted and ringing wet.  We got all of the bunks tore out and when we get back to it we'll finish the remaining wall and ceiling siding, trim, and start on the wall between the bedroom and bath.

Saturday, July 16, 2011

Gentlemen, start your engines

Today, I finished up the installation of the new spin-on fuel filter assemblies.  After that, I reprimed the fuel system with the nifty garden sprayer priming system that I put together and then attempted to start the engine.  After the priming equipment was removed and the main supply line filled and hooked up, I hit the starter switch and she lit right off just like a good detroit diesel should.  Purred like a kitten.  I let her run for probably 10 minutes at a high idle and checked over things looking for obvious problems.  Everything looked ok so far and no leaks showed.

I also took the time to check the output on the new alternator installation at a high idle.  The alternator was putting out voltage so it appears to be ok too, I'll just have to live with the no charge at idle situation for a while.  It appears that the real fix for that might be having to move the alternator to the other end of the engine and driving it off the crankshaft pulley.  For now I'm leaving it where it is and will just be conscious of my low idle time and chassis electrical demand.

The bus will sit overnight and tomorrow we'll see if the prime has held.  One thing for sure, the new spin-on filters are SO much easier to fill and install than the old canister type that I removed.  If I ever have the need to reprime the system again, I have the equipment to do it with.

Friday, July 15, 2011

New Fuel Filter Assemblies

I installed the new spin-on fuel filter assemblies today.  I picked up the new brass inverted flare fittings that I ordered yesterday from Republic Diesel.  8 fittings were just under $40 dollars.  Since I buggered up the threads on one of the old fittings trying to remove it from the old primary head, I decided I would get new fittings and install everything new except for the hoses.   Several weeks ago I ordered a fuel pressure switch which was missing from my bus.  You can see it to the right of the secondary filter ready to have wires attached.  This switch prevents the starter from engaging after the engine starts.  I managed to get all the fittings except one in and the heads mounted before I quit for the evening.  Tomorrow I plan to install the remaining fitting and prime the fuel system.

All of the fuel hoses looked ok except for the inlet hose from the bulkead fitting to the primary filter.  As you can see in the picture to the right, the hose is beginning to crack on the outer casing, so I went to BG Rogers and had them make a new fuel hose for me.  After I get the system primed then I will install this hose as the final piece. 

Thursday, July 14, 2011

Converting to Spin-On Fuel Filters

Several days later I went to see Charlie at Bluegrass Tours (my go-to guy for bus repair advice).  He suggested I go to Republic Diesel for the spin on conversion heads or maybe even a truck junk yard.  I decided to skip the junk yard route as I've never really had much success there.  They are the only truck/heavy equipment junk yard in town and they seem to not have much in the way of the old two-stroke stuff.  So I went to Republic Diesel, late Tuesday and ordered the primary and secondary filter heads.  The heads were about $65 each with the filters being $6 each, which is almost half the price of the filter elements for the old canisters.

I made it out Thursday to pick up my parts and started to remove the old heads later that afternoon.  I now have had a lesson in just how soft brass fittings are as I buggered up one of the 90 degree induced  flare fittings trying to remove it from the old primary head.  These fittings have probably been in place for 35 years.  So all comes to a halt once again.

I went out to BG Rogers on Georgetown Rd to see if they had the assorted 90 degree fittings that I needed as at this point I was going to replace them all and have a spare or two for the future.  BG Rogers is the one that made up my new rubber fuel supply line that runs from the bulkhead fitting to the filters.  However, they did not have the induced flare fittings in stock.  My next stop was Republic Diesel, once again.  They also did not have them, but would order.  So I ordered them and should have them tomorrow.  So maybe Friday afternoon or probably Saturday I'll hopefully get back to installing the new fuel filter heads, filters, and repriming the engine fuel system.

Sunday, July 10, 2011

Lost Prime

In my previous post about the alternator issues, I mentioned that the engine lost prime.  Sure enough, after removing the two fuel filter canisters they were half empty.  Classic case.  I purchased two sets of filters at O'Rileys a few days later.  On Saturday the 9th after finishing work, I attempted to install the filters, fill the canisters and install on the engine.  The secondary filter went ok, but I never was able to get the primary on correctly.  The filter element didn't appear to sit right and the canister would not pull up to the head properly when I tightened the center bolt.  When took it appart for the last time and removed the filter element, the bottom of the element seal and flange was stuck in the bottom of the canister, with what now appear to be the previous element seals too.  I could not remove them, so next week I plan on getting a conversion kit for "spin on" filters and get rid of all of the canisters.  Working with the canisters is a royal pain, laying on the ground, with your hands over your face, pushing up on spring loaded, partially filled fuel canisters.  More to follow when I get the new parts.

New Alternator

Ordered a Prestolite 24V 150A alternator.  Back in March the last time I ran the engine, I measured the voltage at the batteries while the engine was running.  The alternator had been changed out by the previous owner due to a succession of alternator problems with the old 50DN alternator.  So he removed the original setup and installed an aftermarket smaller alternator.   It appeared that the alternator was not putting out a charge.  With one of the wettest spring seasons on record, I was unable to do much work on the bus for months.  After much research and a lot of going from one place to another talking to one shop and then another I ended up ordering a new and larger output alternator online from www.ereg.com.

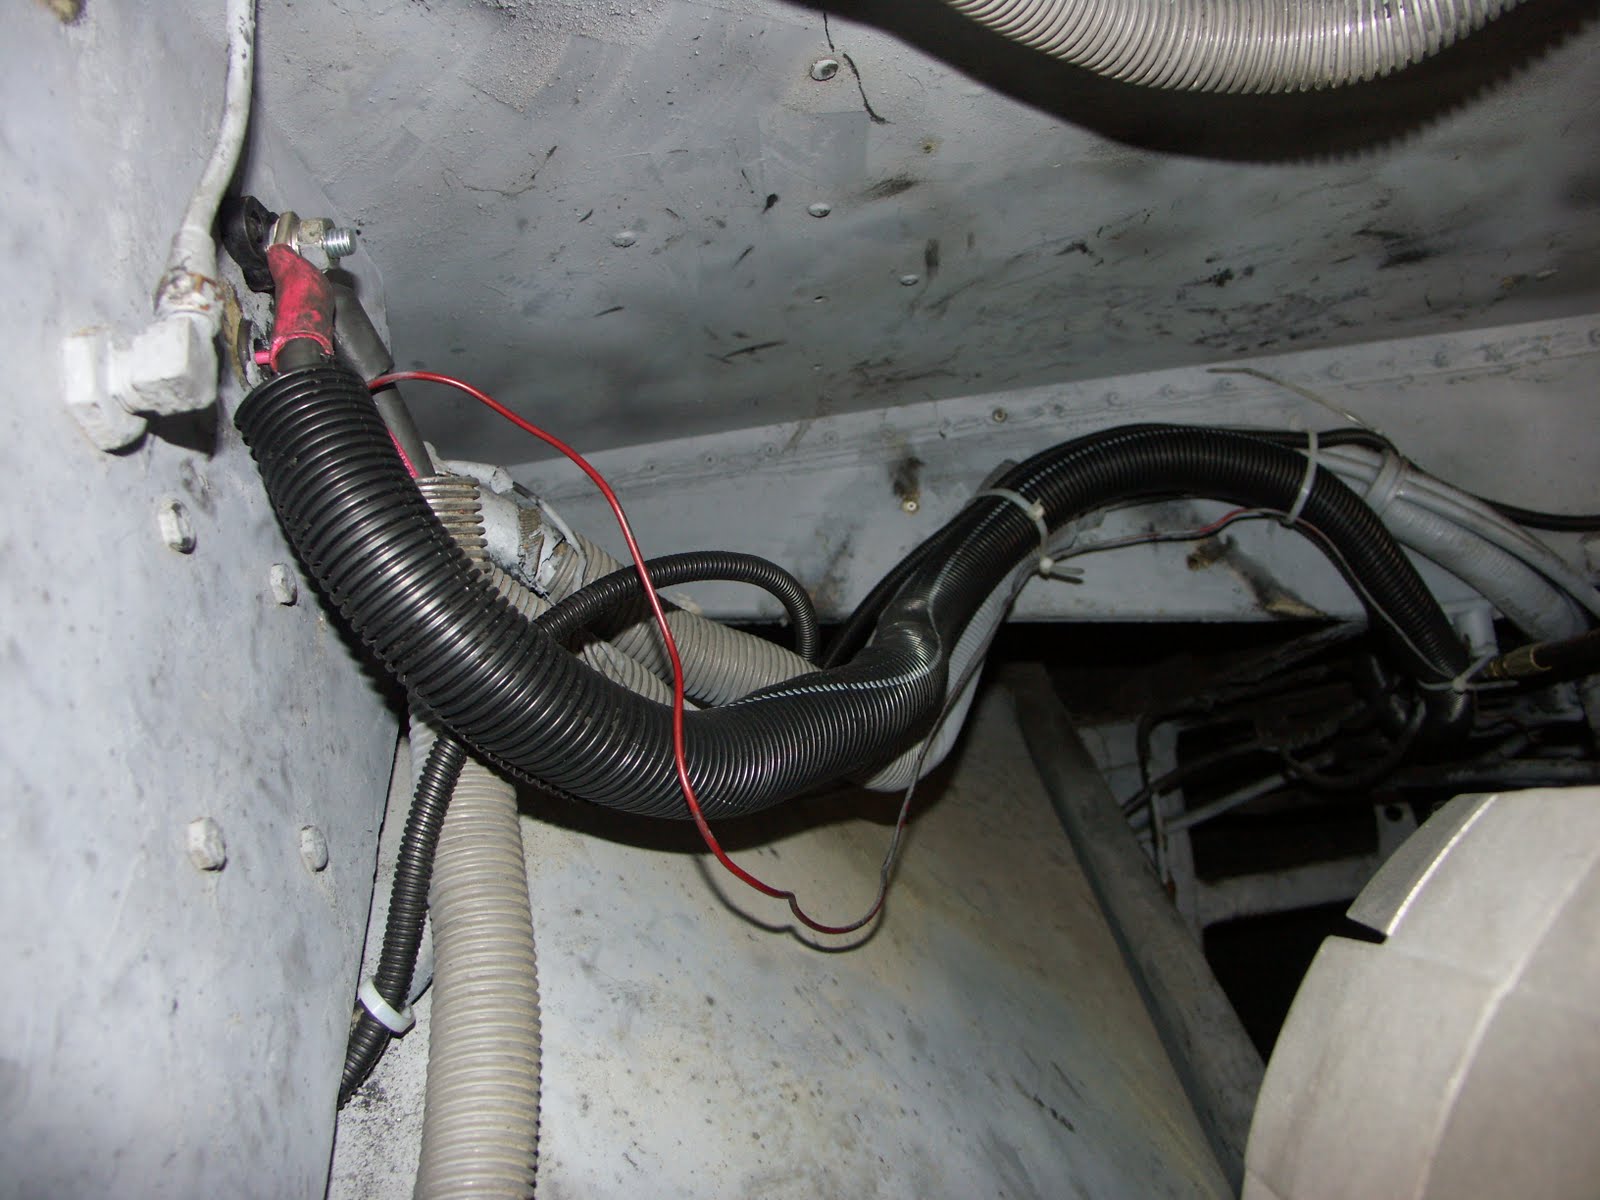
While the old alternator was out it gave me the opportunity inspect some of the engine room wiring.  Several major wiring runs across the engine room were run inside of plastic wire wrap.  On inspection, I found a horror.  Approximately 5 foot of 1/0 cable was completely bare of insulation.  It evidently had dry rotted and fallen off and someone is the past covered it up by putting it in wire wrap.  While it was somewhat protected, it sure looked like an electrical fire just waiting to happen.  So I removed it all.  Nandino Industrial Electric made up new cables for me and did a great job.  When I get ready for a house battery bank they will be the ones I go to to have all of the cables made up.  I also replaced the "pass through stud" in the rear panel box that the alternator and this 1/0 cable hooks to.  Had new cables made for the new alternator and cleaned up some wiring in the rear panel box.Pictures below are some of the new cables and replaced wiring run inside of new wire wrap and tied up secure.

Greasy ME working from the street side rear access cleaning up the wiring, removing the old alternator and installing the new.


After several months of work off and on around working and the weather, I finally got the job completed and was ready to start up the engine and test the alternator.  Started it up Thursday the 7th of July... lit right off and ran for about 5 minutes then started to faulter and die.  I suspect that I'll find the fuel filter canisters partially empty, which means she has lost prime.

For the brief few minutes that she ran, I hooked my meter to the alternator and was not getting a charge at idle.  At first I thought something was wrong, but after researching the specs on the new alternator, I think my problem is lack of idle RPM's for the alternator.  The cut-in RPM is 1400 and it turns no where near that at engine idle.  The driven pulley diameter is 3" and the driving pulley diameter is 5", which means the alternator will not get up to 1400 RPM or better until the engine is at about 850 RPM.

I suspect when I get the lost prime issue resolved and the engine running again, that when I increase the RPM's that the alternator will put out the proper voltage.  I am not sure of the options of either increasing the driving pulley diameter or reducing the driven pulley diameter, but either way would help the alternators idle RPM situation, but that is another battle for another day.  At this point I can live with it the way it is for a while as I have more important issues to resolve.